loading
please wat
Manual for sewing patterns
In order to correctly print and connect the A4 pieces of paper with patterns, the below steps should be followed.
1) Open the PDF file which includes the template. Click on the command “print” or on the printer icon. A pop-up window with printing option should appear. In the options menu, choose the option without scaling for the print-out, which means that it should be in scale 1:1, no matter if the printer will cut a part of the printed image. (pic. 1)

Picture 1
Just to be sure, tick the portrait orientation of the print. (pic. 1)
2) In order to verify the correctness of the printer settings, it would be good to print the first page of the pattern (second page of the document with the pattern) on which we placed the “test square” sized 5 x 5 cm. If all is set up correctly, this element should be exactly 5 x 5 cm on the printout. Be aware of the fact that even the smallest difference of, for example, 1 mm, will cause a difference of 10 mm per 50 cm and 20 mm per 1 meter. In other words, if the square is 49 mm, the pattern will not be in the proper scale and its elements will differ in size, instead of 100 cm – 98 cm which is a significant difference. This is the reason why setting up the printer settings properly and the test print of the “square test” is the key element for the correct pattern printout. (pic. 2)
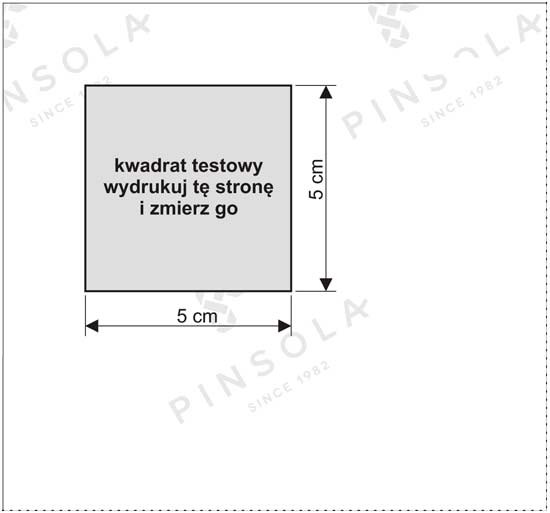
Picture 2
3) Because of the complexity of the file, there might occur problems with processing all pages of the print by the printer at once. In such a case, the print should be divided into smaller parts, e.g. 5 pages at once.
4) Match the printed pieces of paper by the marked edges. For example, the edge marked 1a needs to be aligned with the one having the same 1a marking, 1b with 1b, etc.
Picture 3
While matching the print-outs, their corners should create a rhombus (if the print covers 100% of the page – more details later) (pic. 4)
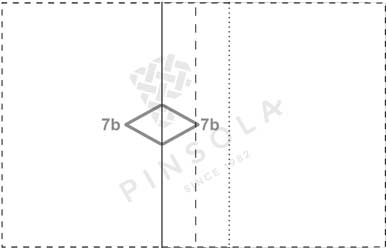
Picture 4
5) Imperfect printers. In general, around 90% of the printers available on the market does not cover the full surface of the paper with print – it leaves margins blank. Therefore, the print-outs will not be perfect, and the size of the margin area can vary, depending on the printer. Even though the rhombuses will not look ideal, do not worry – the most important thing is for them to be placed facing each other.
Picture 5
6) The printed-out pieces of paper can be combined together in two ways. These are:
a) The pin method.
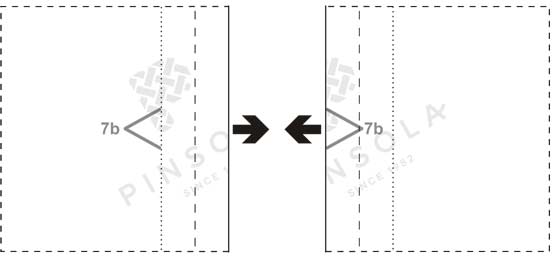
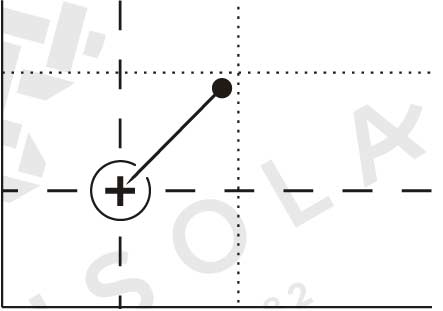
Each page has been marked in the corner with a symbol of a cross inscribed in a circle and a pin symbol. (pic. 6)
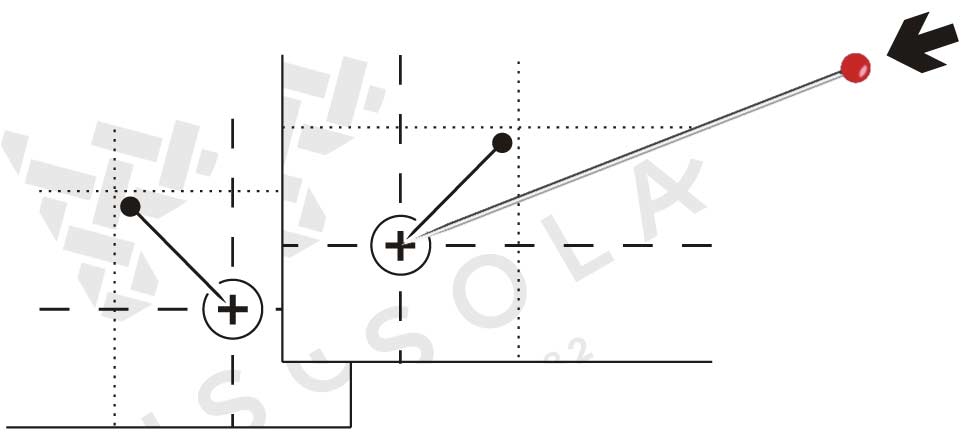
Pin through the marked spots in the corners of the marked pages. The page on the right should always be on top. (pic.7)
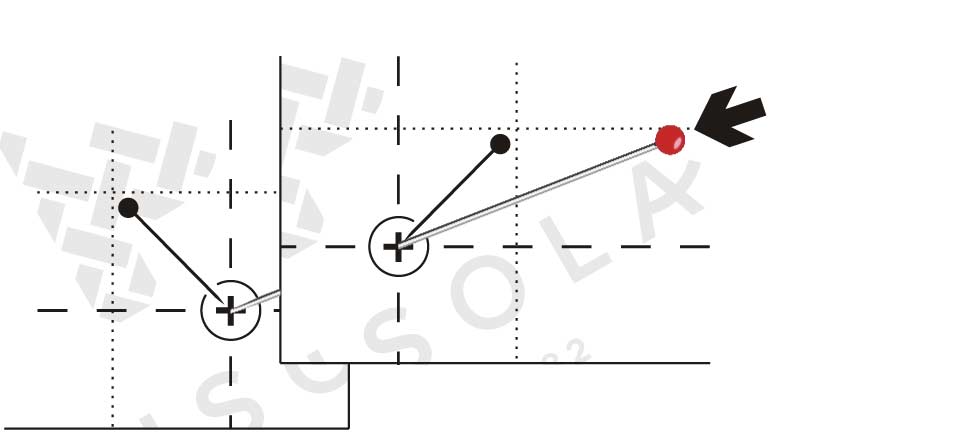
Picture 7
Repeat the same activity on the opposite side of the matching pieces of paper (as per markings). (pic. 8)
Be aware that the print-outs are not perfect! - problem described in 5.
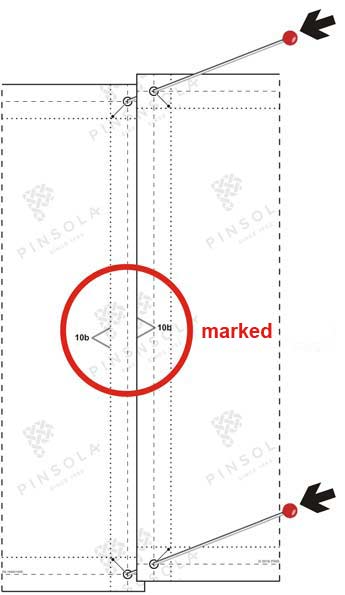
Picture 8
We receive two combined pieces of paper, which should look like this (pic. 9)
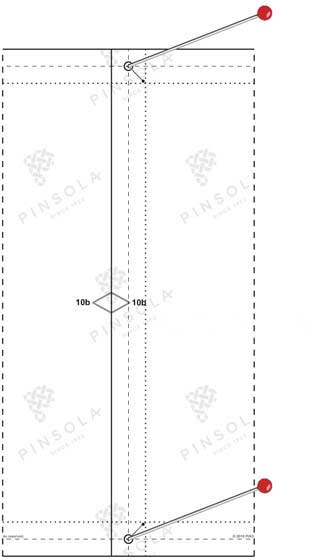
Picture 9
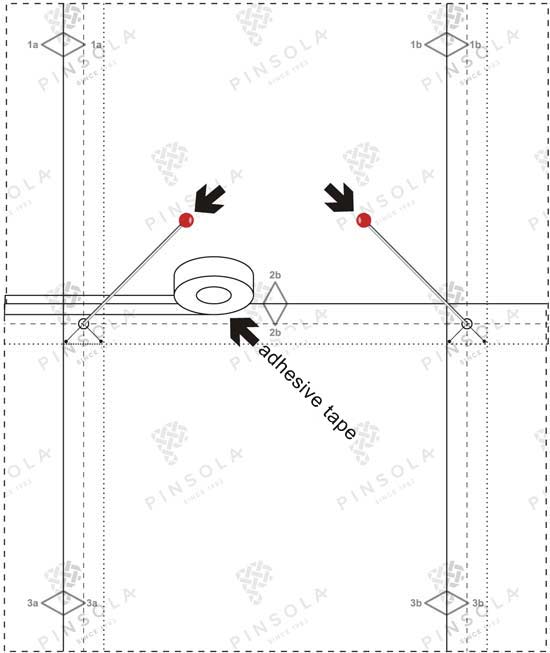
To make things easier for yourself, try putting a soft material underneath the print-outs and pinning them to it, like a piece of cork or a floor-covering material. Matched pieces of paper connect together with a transparent adhesive tape. (pic. 10)
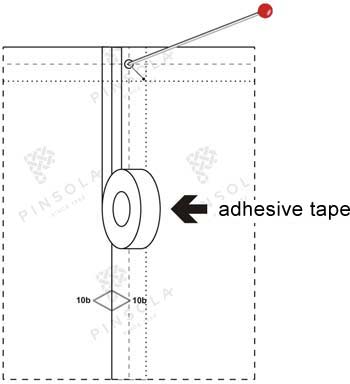
Picture 10
This is how we connect the pieces of paper of the pattern into lines. On the first page of the template is the general view of the whole pattern – looking at it will help to evaluate the amount of the pieces of paper and how they be connected into lines and then further (lines – here pieces of paper next to each other horizontally). When all lines are formed, they need to be connected to each other as well. Use the same method of connecting the pieces of paper as before. The first line should go at the bottom and the following one on top of it and so on. It is advisable to use several pins to connect the lines with more precision and for them not to move while being taped. Also remember about the markings in order to connect the pieces correctly. (pic. 11)
Be aware that the print-outs are not perfect! - problem described in 5.
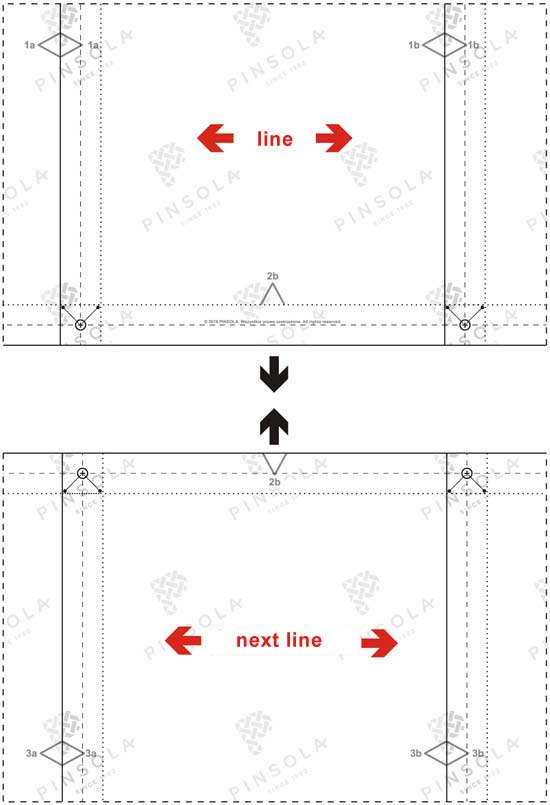
Picture 11
The lower line should overlap the line on top of it. The correctly connected lines should look as presented in the picture 12.
Picture 12
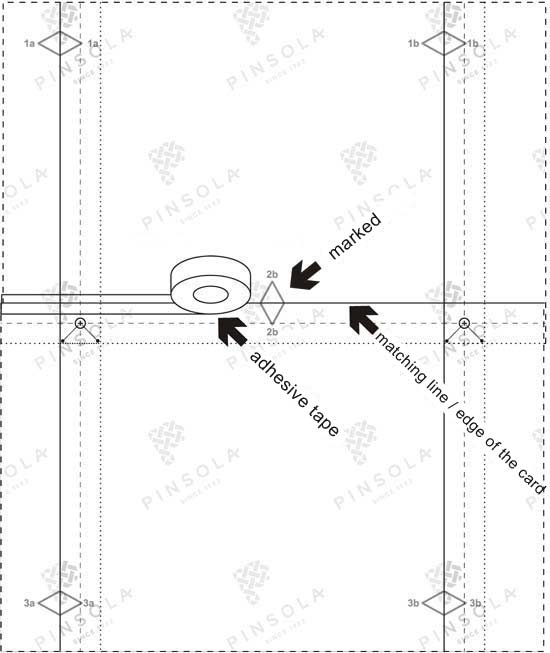
b) The line-fitting method (for people with advanced manual skills)
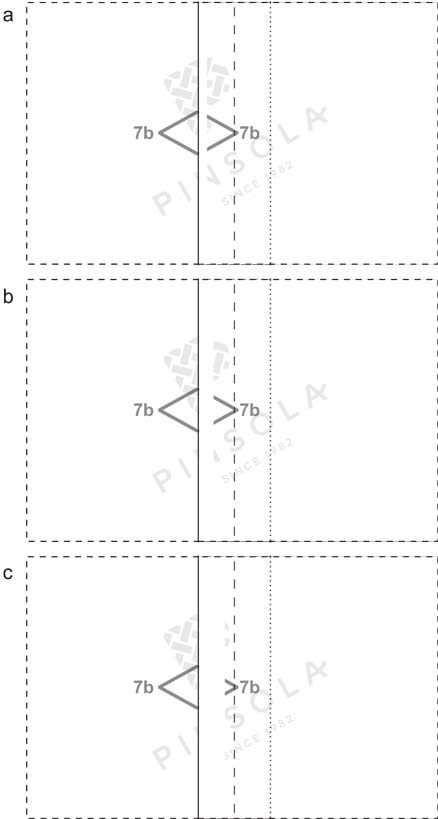
Each page has lines and markings showing how the pieces of paper should overlap each other. (pic. 13)
Picture 13
There are three elements that guarantee the correct layout of the pattern:
- pieces of paper should be put in lines (as in the first method)
- the markings presented in picture 13 should be identical on the neighboring pieces of paper
- the edge of the piece of paper should fit in the fitting line (pic. 13)
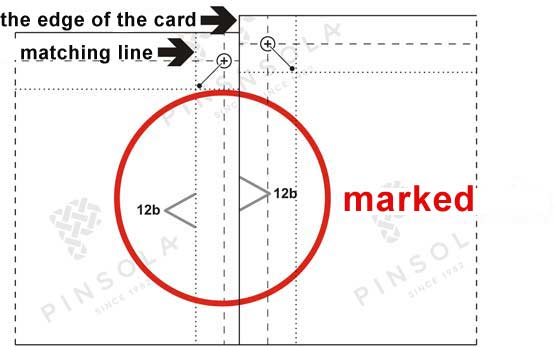
The correctly connected pieced of paper are shown in picture 14. The fitting line aligns with the edge of the next page, the markings on both pages are identical and the arrow-shaped elements create a rhombus.
Be aware that the print-outs are not perfect! - problem described in 5.
Picture 14
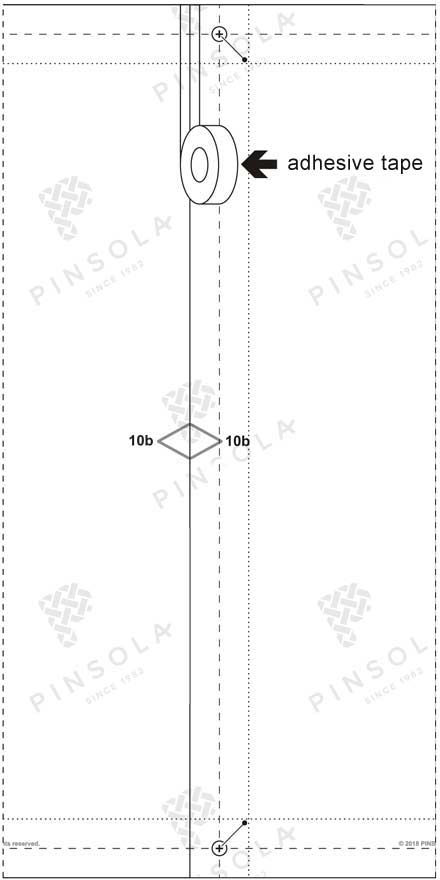
Correctly fitted pages can be now taped together.
Then the lines should be taped the same way. The markings between the lines should be identical and the edges of the pages should fit in the fitting lines. Connect all with a transparent adhesive tape. The correct fitting is shown in picture 15.
Picture 15
Pictures of exemplary tailoring pattern print-outs during the fitting.